
Regardless of the chain lube you decided to apply, the first thing you need to do is to clean your chain thoroughly. The same holds true for a new chain. Cleaning it before applying your preferred lubricant allows the product it to penetrate better. Once you learn the ropes, the entire process will be a question of minutes.
1. Choose the right lube
There is an incredibly wide range of chain lubes developed for various conditions. The weather where you ride is probably the most reasonable indicator to follow when picking the best one for you. There are wet lubes for rainy conditions, snow, or slushy roads. Others are designed to work in dry environments. They attract less dirt than a wet lube; but you have to reapply them more frequently, it just depends on the formula.
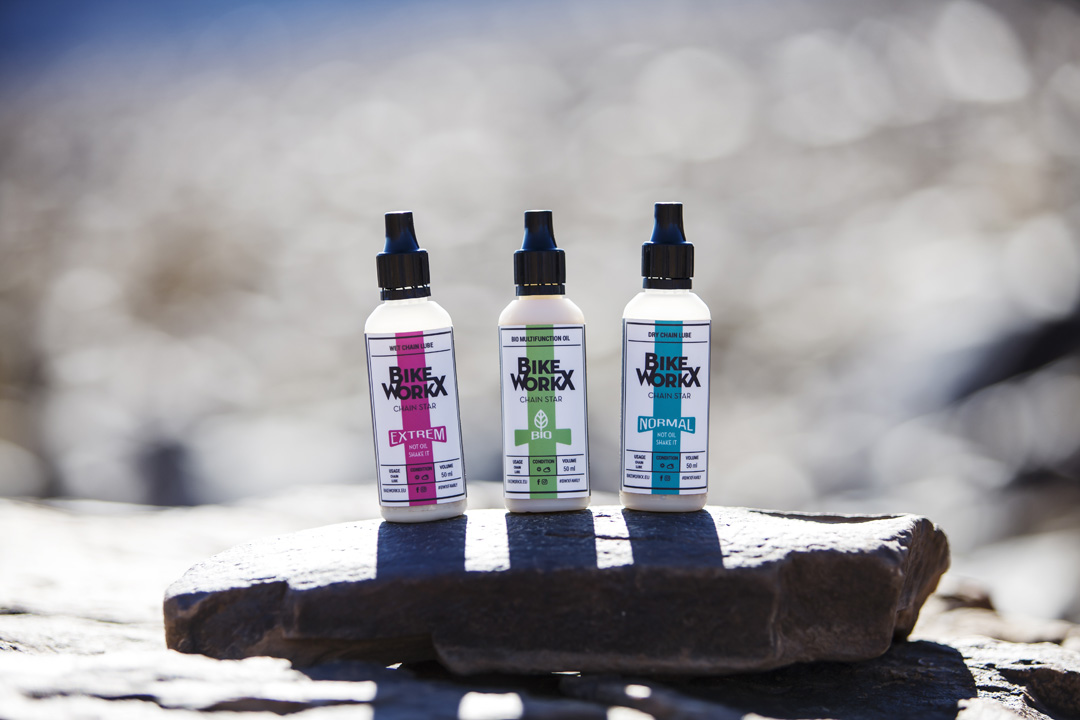
Despite a lower level of protection against general humidity and water, wax-based lubes are more commonly used in arid climates. They are less messy and will keep your chain, hands and clothes tidy too. Advanced lubricants, such as Bike WorkX Chain Star, were developed to penetrate chain link plates quickly and last a long time. BikeWorkX’s “normal” formula consists of two components designed for everyday use in arid to moist conditions, and it is even safe to use on watertight o-rings.
Die-hard cyclists who don’t mind riding in heavy rain, mud, and snow would probably benefit from the more durable agents in the “Extreme” formula. Riders who prefer an environmentally-friendly bike lube should seek out their biodegradable “Oil Star” version. It is a lighter, more general lubricant, so it would need to be applied with more regularity. Read any product labels before purchase.
2. Cleaning the bicycle chain
The bicycle should be in gear, so you can backpedal freely. Using a dedicated bike stand is the best solution as the wheels are off the ground. However, you can prop the bike against a wall, but make sure the crankset and pedal turn 360° without any obstructions.
Apply some kind of degreaser to the chain. We recommend any one of many biodegradable versions available on the market today. The best application method is a dedicated reusable chain cleaning device that physically closes over the chain. It has a small reservoir to fill with your degreaser of choice. As you hold the chain cleaner in place and pedal backwards, its degreasing bath works with an internal chain scrubber and rotating brushes to scour the bike’s chain on all sides to remove built up grime. Used (and now very dirty) fluid gets stored in a separate reservoir for easy disposal.
If you don’t have a dedicated chain cleaning device, you can usually find a chain cleaning tool in the form of a stiff bristled brush and degreasers in your local bike shop, but this combo isn’t as convenient nor as clean. The spray from the brush as you work to clean the chain can leave you peppered with greasy bits of debris!
For the next step, a lint free rag is best, but being lint-free isn’t a deal breaker. Pretty much any old dry rag will do, your old One Direction band merchandise T-shirt for example. Spray some degreaser onto it, but do this well away from your bike as invisible micro particles may get into spaces you don’t want it. Now hold the rag against the bike chain, and with your free hand, slowly rotate the pedals backwards so the chain runs through it.
If the process results in the chain slipping off the chainring, simply put it back and carry on with your deep cleaning. Pedal the chain and repeat the action a few times, but with the rag turned to a clean face before starting again. When it is sparkly and looks like new, that’s when you know you’ve got a clean chain. If your rag (and chain) still show dirt and grease, repeat the entire process a second time for a more thorough cleaning. If you have access to a hose, give it a final rinse with clean water. Dry it with a clean rag and let sit to air dry.
Don’t forget to clean other components like the jockey wheels on your rear derailleur and the front chain rings too. If you skip this step, you’ll have a dirty chain all over again. Those derailleur pulley wheels can have stubborn grit caked in, but if you hold a flat headed screwdriver at an angle against them you pedal backward, you can remove the bulk of it fairly easily.
Ultrasonic cleaners
Ultrasonic cleaners will do the best job as chain cleaners go. It’ll come out looking like new, but not everyone has an ultrasonic cleaner lying around the house. They aren’t too expensive if you decide to invest in one, and they can be used to clean your cassette sprockets as well as your chain. But you need basic bike maintenance skills and the tools necessary to remove and replace these components. If you do get one, be sure the tank is wide and deep enough to cover your entire cassette. You’ll need to fill its reservoir with fresh degreaser every time you use it, but it does an amazing job in a matter of minutes thanks to its ultrasonic deep cleaning action.
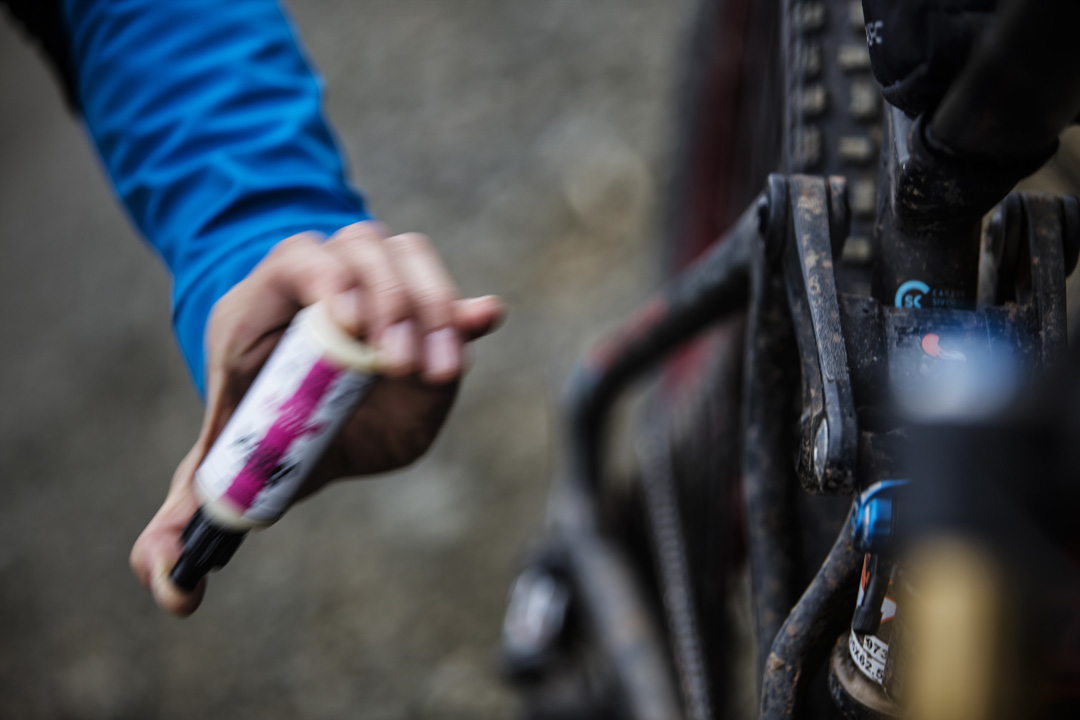
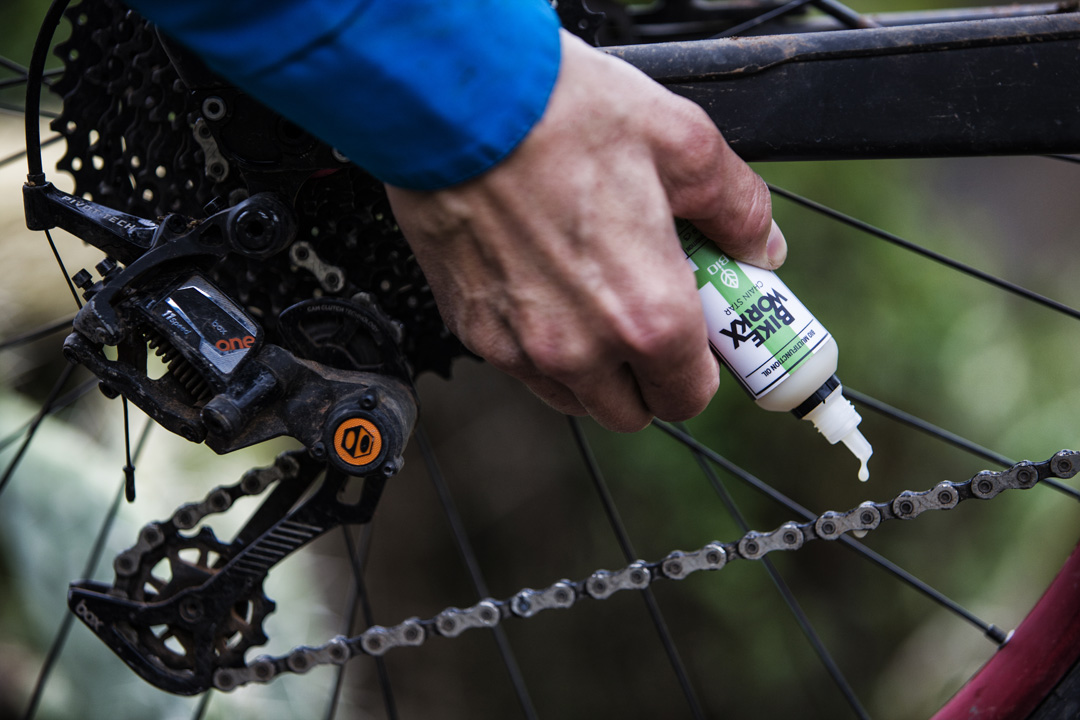
3. Applying the lubrication
As chain lubricant contains different components that get separated between long periods, shake the container thoroughly before use. Position the tip of the bottle upside down over the chain. Prepare to give it a gentle squeeze so measured drops fall onto each link in the chain. With your free hand, slowly pedal backward during application to evenly distribute it along the entire length of the chain.
To work the lubricant into the link plates, lightly place your thumb and forefinger over the chain and run it through your fingers. You should be able to feel missed spots and it helps to distribute the lube throughout without the need to reapply. More is not necessarily better. Repeat this process until you are satisfied and then leave the product to soak in, overnight is best. You should not immediately head out on a ride.
4. Wipe excess lube from the chain’s surface
Although many cyclists skip this step, it is an important one if you want to lube your bike chain properly. Why it is important? Well, there’s no need for excess lube on the outside of the chain links as friction occurs between them. Any surplus product attracts dirt which leads to a deterioration in chain performance after a while. To remove any excess lube from the chain’s surface (after letting it sit overnight) use some other old band’s t-shirt as your rag and gingerly pass the chain through it.