
I believe that each bikepacking trip is different and needs to be carefully planned to get the best out of it. Or, at least, that’s what I like to do. I really enjoy going through the route on the map and trying to predict what will be the right gear for that particular occasion. I consider many facts including the length of the trip, weather forecasts, mileage, geography, etc. As mentioned in one of my previous articles, bikepacking bags are quite compact compared to the standard bike touring bags, so you will always have to make compromises. That is why I prepare everything where I can see it, like on my bed or on the carpet, and not directly pack it into the bags from the get-go. Because I know that I always overpack in my first attempt and I will need to sacrifice something to fit everything in the bags.

When packing, it is important to be careful with the weight distribution because a wrong one can make bike handling a nightmare. As I mentioned earlier, I put the heavy things in the frame bag, things for camping in the handlebar bag, gear to use during the day and shoes in the saddlebag, and accessories and food in the fuel bags. This way, I already know that my bike will be fine. When I carry a tent, I strap the poles to my fork.
So, what should you pack? There is not a perfect formula for packing. There are endless factors that influence it. A 1000-km trip can be very different in Greece or Central Europe. But, for sure, there are certain things that – regardless of where you ride and for how long – are necessary for you to get out of trouble and travel comfortably. I like to use checklists because then I rarely forget things. I’d like to share them with you.
Tools and devices

These items are the first I pack every time I hit the road. Apart from lights, bidons, a GPS by Garmin and a smartphone that I immediately mount on the bike, here is the rest I put in the frame bag:
– Pump
– Essential kit
– Spare inner tube (even if I use tubeless tyres)
– Chain breaker
– Park Tool Super Patches
– Some duct tape I wrap around an old credit card
– Chain quick links
– Spare derailleur hanger
– Mobile recharger
– Power bank
– Front and rear lights
– 2 Zip Ties
– Power bars
– Pain killers
– 2 bidons
– Bike lock
– Chain lube
– Multitool
– Swiss knife
– Thermal blanket
– Smartphone with offline maps
– Garmin with loaded routes
– Mobile mount (I use Quad Lock with waterproof poncho)
– Sunscreen and mosquito repellent
– Toothpaste and toothbrush
– Money
– Copy of an ID document
Sleeping gear

Once I cover the basics, I get to thinking about the way I am going to sleep on the upcoming trip. I admit – I enjoy staying in hotels from time to time but most of the time I sleep outside. I have two options: a ‘good-weather’ mode and an ‘anything-goes’ mode.
If the weather is nice, I like to sleep in a hammock. It is not too comfortable for me, I wake up many times during the night, but it gives me a sense of security opposed to a tarp, which is also perfect for good weather. I use a king-size hammock because it allows me to use the extra fabric to cover myself when nights are chill or when there are mosquitos. When sleeping in a hammock, you might feel cold coming from below so I would recommend using it with an ultralight mat. You can also upgrade your hammock with a mosquito net and even a waterproof tarp but I would rather not because it increases the weight and, in that case, I would rather get a tent. And, of course, you will need a sleeping bag. So my checklist for those sweet summer trips blessed with good weather is as follows. All items go in my handlebar bag.
– Hammock (or tarp if you prefer)
– Ultralight sleeping mat
– Sleeping bag
– Headlamp

If the weather is uncertain, I normally go for the tent. I sleep really well in a tent and I feel refreshed the morning after. But even if I have an ultralight single tent, it is still heavier and bulkier than a hammock so I use it only when necessary. If the weather seems rainy but still warm, I sacrifice the sleeping bag to reduce weight and, instead, I bring a merino base layer and a simple sleeping bag liner. So, my checklist for uncertain-weather camping looks like this:
– Ultralight tent
– Inflatable pillow
– Sleeping bag or sleeping bag liner + merino base layer
– Headlamp
I put everything in my handlebar bag but the tent poles. Those I strap to the fork using a strap anchor and Voile Straps (more info in my previous post).
Merino base layers are not only good in winter. I often use them when I sleep in the tent in summer instead of a sleeping bag.
Apparel

I leave the choice of clothing at your leisure but, personally, I use road apparel that works also off the bike so I can carry less weight. The list of cycling apparel that I always take with me looks like this:
– One or two cycling kits (depending on the length of the trip. One if the trip is 1-3 days, two for 4+ days)
– Rain jacket
– Cycling cap
– Beanie for the night
– Cycling shirt (I use Cascada, they are the best I ever tried and great off the bike too)
– Sandals
– Cycling shoes
– Arm and leg warmers if I might encounter some chilly weather (also great at night if cold)
– Cycling gloves
– Cycling glasses
– If I don’t have merino (see Sleeping section), I bring light pyjamas.
– Swimsuit and ultralight towel if there is the possibility of swimming.
What I am not wearing from this list, goes to my saddlebag.
When bikepacking, I rather wear road apparel because it is more versatile and can be used also off the bike
Cooking
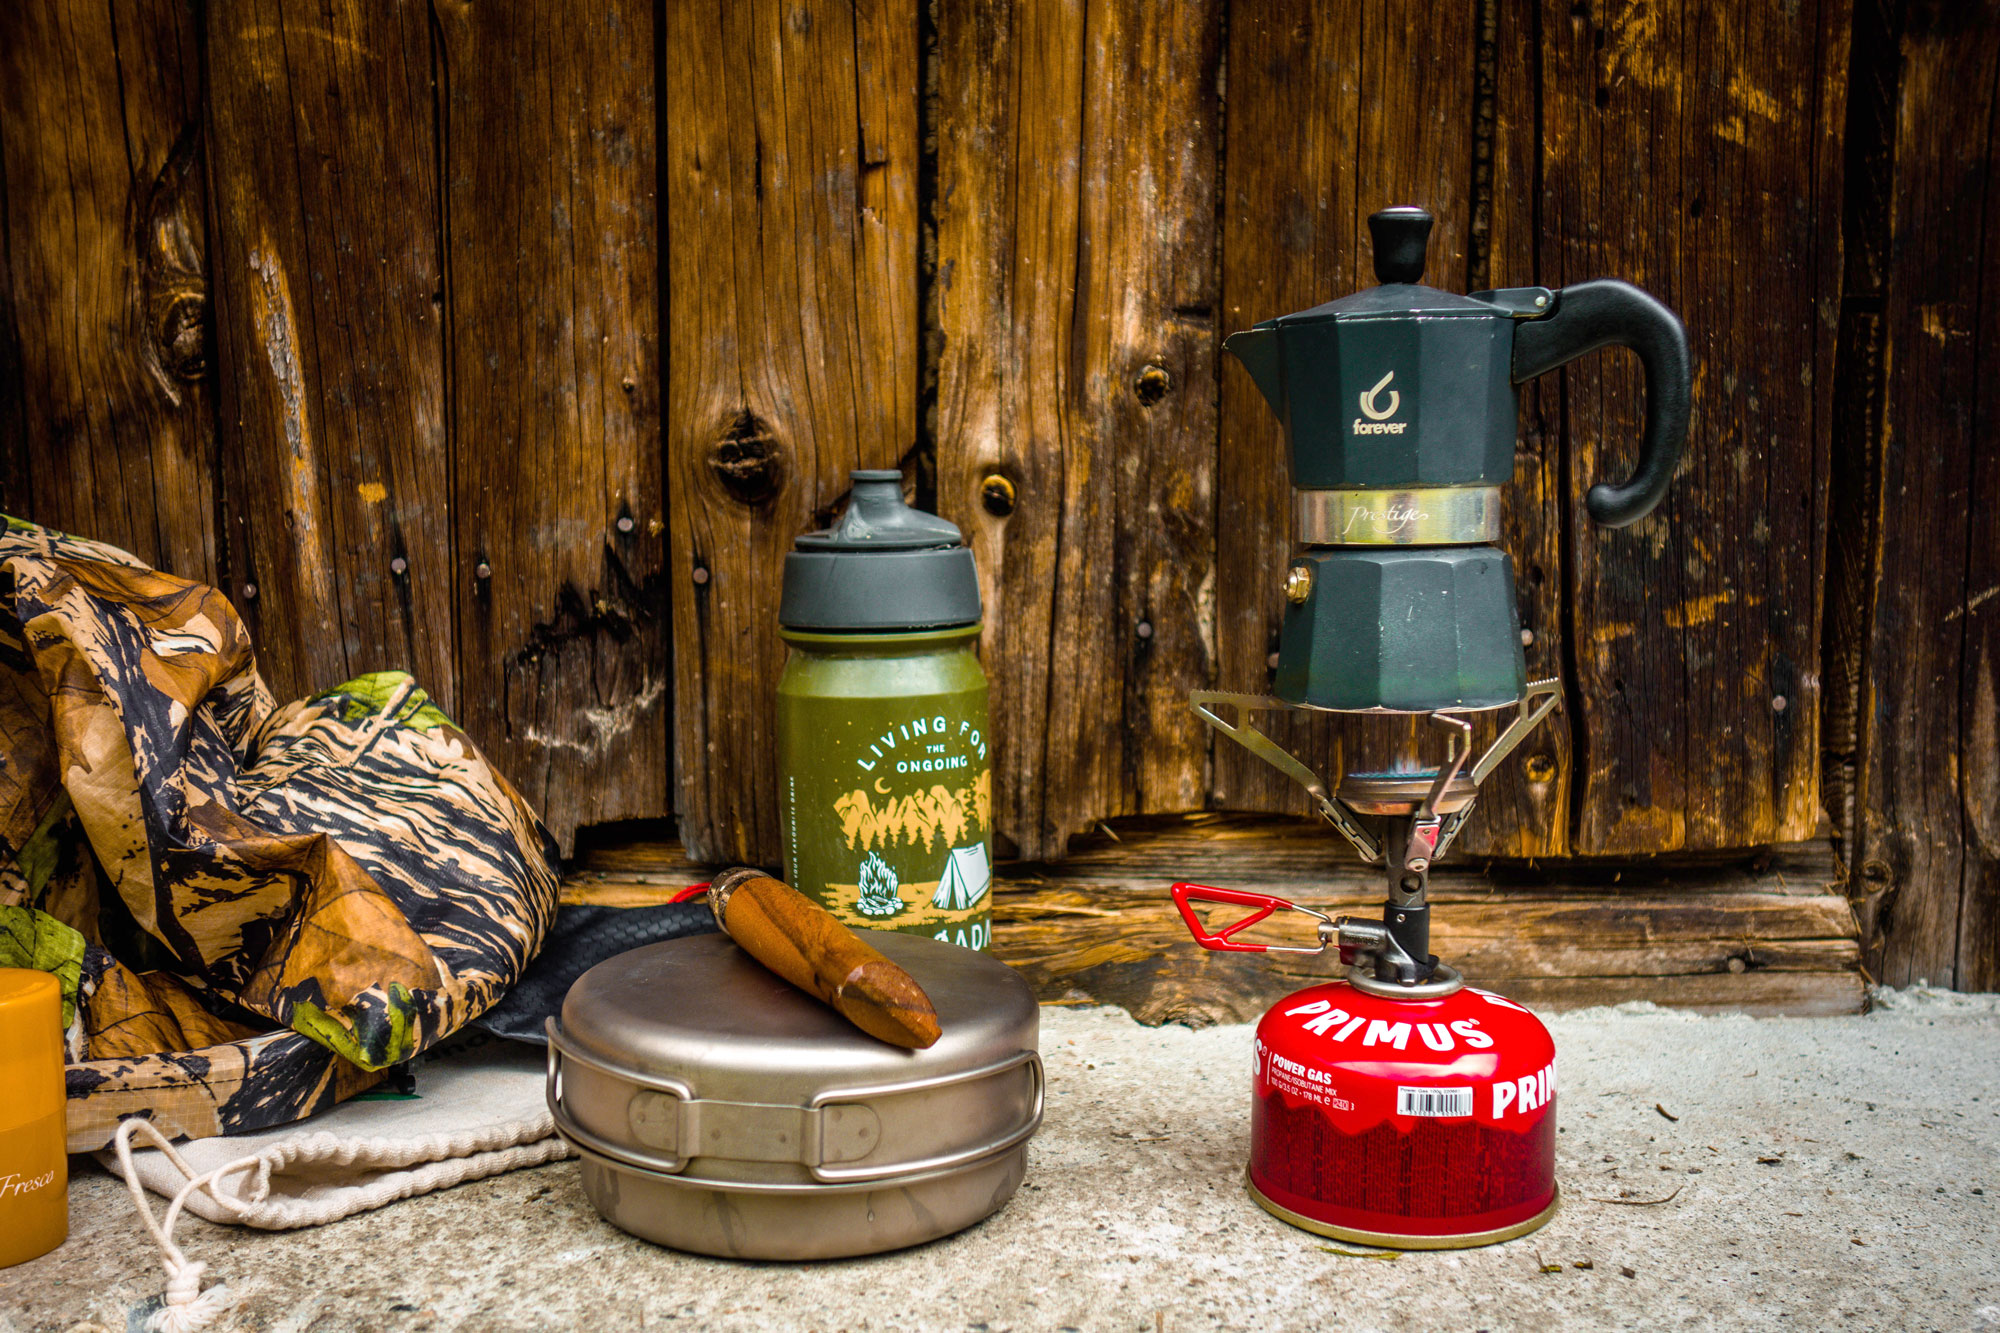
I will cover food and cooking in my next article but, for now, I would still like to give you a few useful tips. I know it is a cliché but we all love coffee in my group of riding friends and a ride is not a proper one if there is not some epic coffee brewing. We have a few ways to do that. I am Italian so if you see a guy riding a bike with a moka pot sticking out of his fork bag, it could be me. Of course, a moka needs fire so we carry a simple cooking set (a stove, a cartridge and a pot) that one of us put in the fork bag. Naturally, the cooking set is not only good for coffee but also any kind of easy warm comfort food when camping, like soups, pasta or noodles. Back to coffee: I also have an AeroPress, which is smaller than Moka, in case I need to spare some room for other gear. Also, Nanopresso and Pipamoka are great for this purpose.
Regarding food, I carry a few energy bars, some parmesan cheese cut into cubes, beef jerky and nuts. This combination of food can sustain me for hours if I cannot find any other source of food. My checklist for cooking:
– Cooking set (stove, gas, cooking set, lighter)
– Moka or Aeropress/Nanopresso/Pipamoka
– Nuts
– Parmesan cheese
– Beef Jerky
– Powerbars
Conclusions
As I said earlier, we are all different and each of us needs to find the perfect personal setting through trial and error, but I hope you found my tips useful and that they gave you a starting point for experimenting. One last tip: make sure your bike is working well before you leave. You are going to load it like a mule and put all components under a lot of pressure. A simple checkup at your local bike shop will save you a lot of headaches when on the road. If you cannot do that, at least lube the chain!
A simple checkup at your local bike shop will save you a lot of headaches when on the road.
If you cannot have your bike checked, at least lube the chain!


