
At a basic level, you do have a choice of either drop bars or flat bars, so we’ll discuss the pros, the cons and the variations available to help you make a choice about what suits you.
Drop bars
Typically, drop bars would be seen on a road bike to aid in streamlining the rider. It all began in the 1880s when penny farthing bikes adopted the drop bar style handlebars. This was done to increase cycling speeds by making the rider slightly more aerodynamic. However, with penny farthing bikes being somewhat of a safety issue, the modern bike (same-sized wheels but with a chain on big and little cogs) was created and included these same handlebars.
Modern drop bars with the inclusion of bar tape and brakes allow for 5 different positions meaning your ride can be longer and more efficient. The positions are:
Tops: Allowing you to sit in the highest position with hands on the flat section of your handlebars. You can usually rest naturally in this position if good bike handling isn’t required.
Shoulders: A similar position to the tops but allowing you to open up your chest in the front. By switching between the tops and shoulders on a long smooth ride, you’re able to ride more comfortably and avoid getting stiff.
Hoods: The most common holding position above the brakes where they meet the handlebars. This allows a combination of a relaxed riding position but with easy access to the brakes.
Hooks: The hooks are the curved section of the handlebars and you would use these in case you need a high level of control as well as a greater need for braking. It’s much easier to pull your brakes in in this position and allows you to lean forward which can be useful on speedy, technical descents – depending on how confident you are!
Drops: This is the lowest position on your handlebars. In this position, you’ll be at your most streamlined so you’ll ride like this when speed and least wind resistance are most important.
This variation in riding positions means you can be comfier on longer rides where you won’t be changing the position of your body much.
Of course, on single tracks and bumpy, rock trails, you might be twisting and turning, leaning forwards and backwards, upright and crouching depending on the trail. This is where flat handlebars have their benefits.
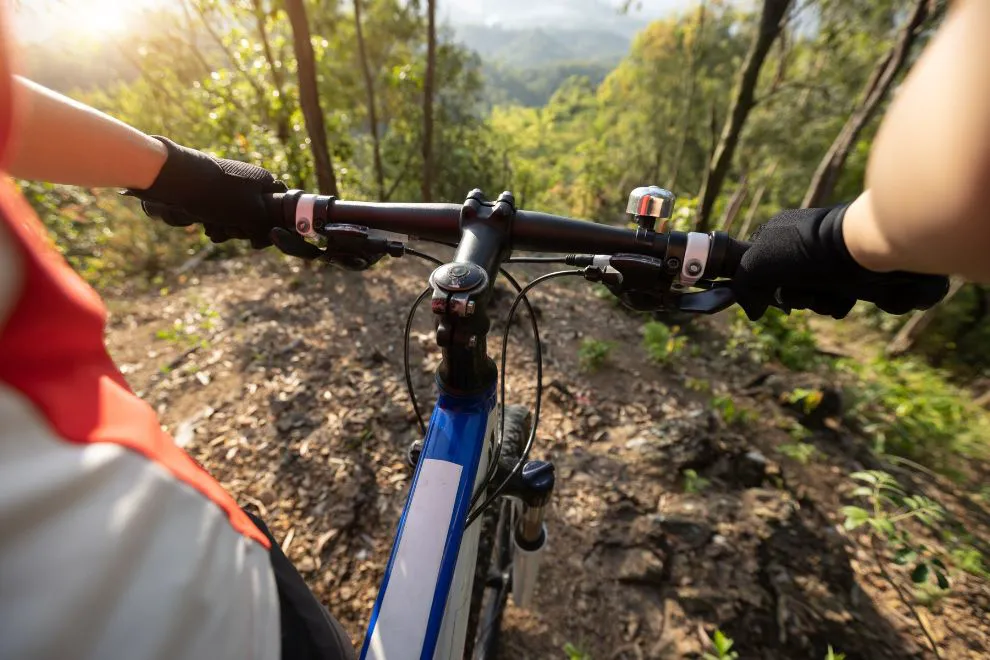
Flat bars
Mountain bikes as standard will have flat bars. This is because you’ll likely be changing direction much more frequently and dramatically than on the road whether this is on berms, or avoiding rocks and holes on a steep descent. As a result, you’ll avoid the fatigue that comes with holding your body in one position for a long period.
Positioning is only really one consideration when it comes to choosing your handlebars however. There are plenty of other pros and cons when it comes to which handlebars are best suited to your bike and ride. A few of which are:
Better control: With a wider hold on the handle bars, you’re able to turn much more quickly giving you better, quicker and more accurate control of the bike overall.
Easily accessible brake levers: Since your hands are always in one position, you will always have easy access to your brake levers. With the possibility of more obstacles, this is of course more necessary on a mountain bike than on road.
Comfort: The upright riding position is much more relaxing for your shoulders, back and neck. You’re unlikely to finish a ride with bad posture!
Loading your bike: With a much bigger surface area and no enclosed space, you can mount more accessories onto your bar without hindering braking and changing gears. You can’t, for example, load a wide bar bag onto handlebars as this may block the ability to shift gears.
Less maintenance: You rarely have to replace the grips on flat bars as they are much more hardy. Bar tape on drop bars is flimsy in comparison and will require regular updating.
Parts are cheaper and more readily available: Mountain bike parts are generally cheaper than road bike parts and you are likely to be able to find whatever you need wherever you are in the world. Of course, it’s best to buy the parts specific to your bike but when you’re halfway up a mountain on another continent, that’s not always easily done.
Variations
Drop bars can come in a variety of shapes and sizes with three determining factors: the width, how low the drop curves and how far forward the drop curves. These can be sized in millimetres if you’re getting really technical so can be fine tuned to the preferences of the rider and the requirements of the ride. There are also some slight variations for flat bars.
There are a number of different styles of bars and these are outlined below:
TT-bars: Also known as tri or aero bars, these are named for their purpose: time-trial cycling, where aerodynamics are more important than in other types of riding. The two parallel bars that extend away from the rider in the centre of the bars act as armrests allowing the rider to learn forward into a position of least wind resistance.
Cruiser bars: The ultimate in comfort, these bars are often seen on bikes designed for casual riding where the rider may also be dressed for comfort and not necessarily riding for sport. Not too dissimilar to flat bars, except they will rise up and towards the rider from the centre positioning the rider upright.
Butterfly bars: Does what it says on the tin, these are designed to look like a butterfly and much like the drop bars, provide a number of hand positions making them good for long days in the saddle.
H bars: Much like butterfly bars in that they are in the shape of a H and are useful in touring and long days. These are great for the wrists and allow for plenty of mounting options for bikepacking.
Bull horns: Similar to butterfly and H-bars, these handlebars look like bulls horns. With wide flat shoulders that then curve forwards and upwards, these look like drop bars but with the drops cut off at the point at which they start to curve down. These are good for aerodynamics and climbing.
BMX bars: The most rigid and durable of handlebars owing to the abuse that BMX riders put their bikes through as a result of jumps and tricks. With a slight upwards sweep, these handlebars put the rider in an upright position but often have an additional horizontal bar to aid durability.
What should I be using?
You may have reached the end of this article and are now more confused than when you started, it can definitely be overwhelming! But it’s great that there are so many options to suit the variety of riders and rides undertaken all over the world.
You will likely only ride the bike that you have (and if you have 16 bikes, lucky you), but try your friend’s bikes, ride around your local bike shop or see if you can rent a bike with handlebars you like the look of.
Nothing will emulate a long day in the saddle other than just that, but you’ll learn along the way what suits you. Riding your bike should feel natural and you should feel in control, making you want to return to your bike again and again. Handlebars can impact this greatly so it’s great to know what’s out there and how you can change your set-up.
Try a few different styles and enjoy the ride.